Trying out AWS Cloud9 IDE for Django development
Currently I’m working on a Django project where a team member needs to be able to edit some Django templates somewhat infrequently. Although he is proficient in writing HTML or CSS, setting up a complete Django dev environment is impractical because of the additional tools necessary to learn and maintain.
I decided to try out AWS Cloud9 IDE that Amazon launched at re:Invent 2017 to see if that would be convenient for allowing others to collaborate on a Django project without the need for a local dev setup. Cloud9 is an IDE that runs in the browser and supports most popular programming languages including Python.
Getting started
As it’s integrated with other AWS services, you can quickly create a new development environment that runs on a EC2 instance of your choice without any manual configuration or prior experience with EC2. By default, the instance will shutdown after 30 minutes of inactivity so you won’t be surprised by unexpected costs.
Cloud9 is more than just a code editor as it comes with a builtin terminal, debugger, tools for collaboration and more. The UI reminds me of Eclipse and looks a bit dated. I’ll describe more about the experience of using Cloud9 later, but first let’s open the terminal to create a virtualenv and install Django.
The EC2 instance is created with the DevEnvAmazonLinuxAmi and comes with both Python 2.7 and Python 3.6. We’ll use Python 3.6 of course:
$ python3 -m venv env
$ source env/bin/activate
(env) $ pip install Django
(env) $ django-admin.py startproject hello_cloud9
To preview the Django application within the IDE, make the following changes to settings.py:
ALLOWED_HOSTS = ['*']  # Or set this to the actual domain used for the preview URL

MIDDLEWARE = [
    ...
    # 'django.middleware.clickjacking.XFrameOptionsMiddleware',
]
The preview URL https://YOUR_CLOUD9_ID.vfs.cloud9.eu-west-1.amazonaws.com proxies any application running at port 8080, so our development server has to run at that port and allow requests from that host. The XFrameOptionsMiddleware has to be disabled because the Cloud9 browser pane uses an iframe to view your web application. Needless to say, do not use these settings in production!
Add a run configuration (via Run > Run Configurations > New Run Configuration) and name this ‘django’. Because we’re using virtualenv, we cannot use the Python 2/3 runner and have to use the ‘Shell Command’ instead. Also adjust the current working directory (CWD) to your directory structure:

Start this run configuration and you should be able to preview your Django application in Cloud9:
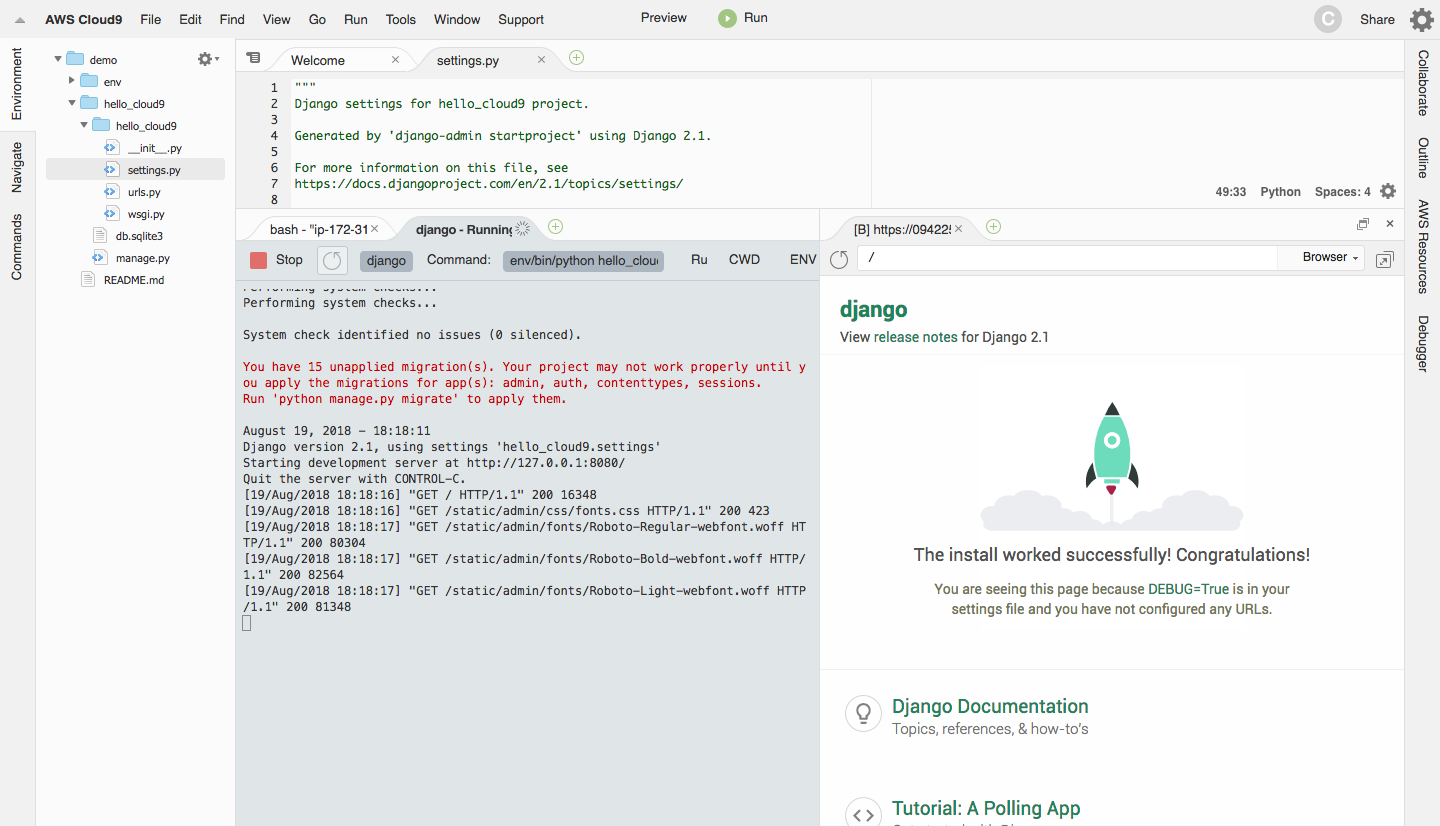
Development experience
I was pleasantly surprised how easy it was to setup a Cloud9 development environment and how you can start coding in the browser within minutes. The UI is quite snappy and using the terminal or starting the development server never felt laggy (even on a t2.nano instance).
A major downside is that there is no builtin Git support. Sure it’s available on the command line, but some people will feel less comfortable using that instead of a GUI.
I’m an avid PyCharm user and Cloud9 is definitely not going to replace that, but I can see others with different requirements being productive with this setup. For instance, it could be useful for teaching programming where a teacher can easily bootstrap development enviroments, and have students coding right away in the browser without the fuss of setting everything up.